Card and Label Designing Software Screenshots
DRPU Card and Label Designer Software help to design and print various cards and labels. It allows the creation of hang tags, brand labels, gift cards, discount vouchers, and clothing labels. Cards and labels designer software designs cards and labels to meet common business and personal needs. With the use of advanced image designing tools like lines, ellipses, pencils, rectangles, text, barcodes, pictures, and stars, one can easily create cards and labels. Software uses advanced printing capabilities to print designed labels and cards with support for both general printers and major card printers.
The following steps are to create cards and labels with software:
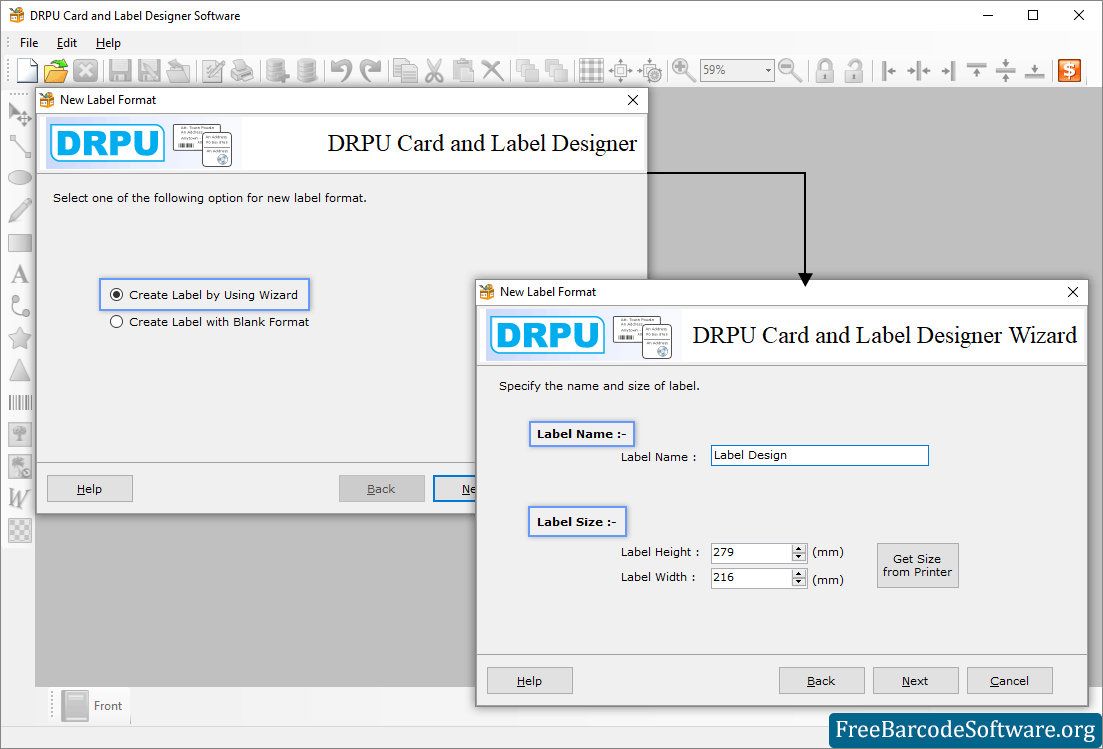
Step1: Select one of the following options to design cards and labels.

Choose Mode of designing to create Card and Label and Click 'Next' to proceed. Specify Label name and size then go to ‘Next’ button to proceed.
➣ User can choose between "create label with wizard" and "create label with blank format."
➣ Specify name and size of the label (with height and width in mm).
➣ Select a type of folder such as quarter fold (side, top), half fold, or post card (no fold).
➣ Add user details by importing data from an excel sheet or entering the data manually.
➣ Go to Picture tool from left tree, and browse path for the image to be insert on your label.
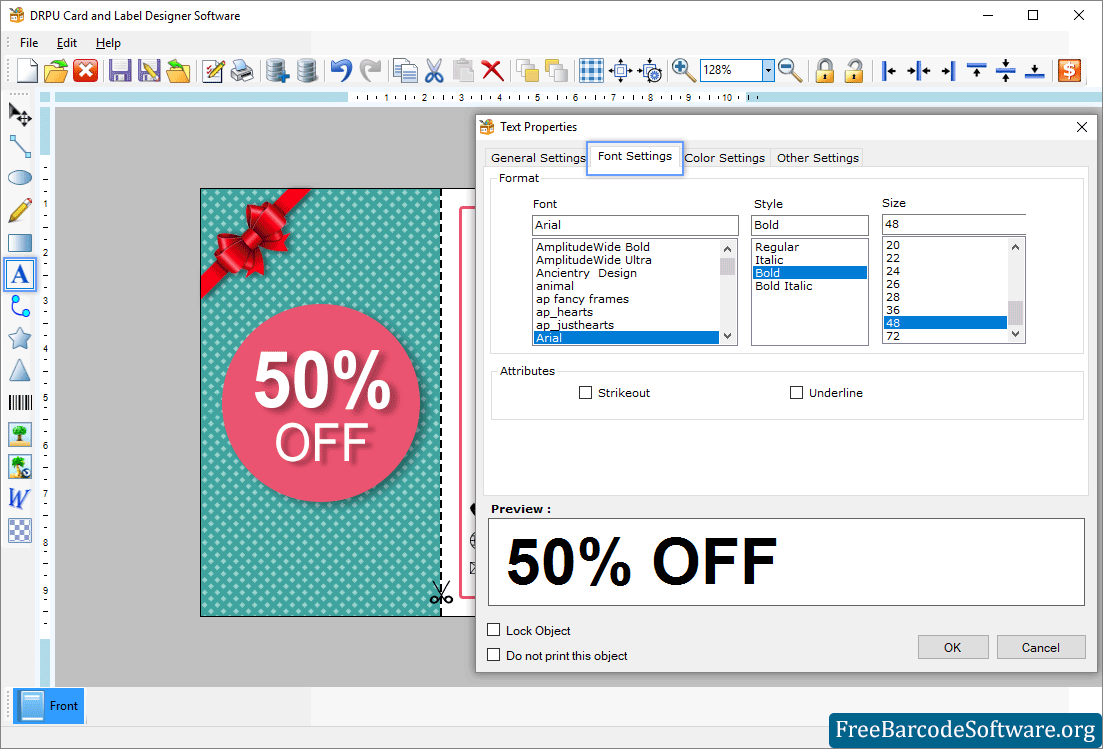
Step2: Right-click on text to change text properties, including general, font, color, and other settings.

Change the Font, Style and Size of the text then click OK.
➣ In general settings, Set the position of text according to the X and Y axis. Choose a data source between manual and data set to add text to cards.
➣ Text formatting options include font type, style (Regular, Italic, Bold), attribute (strikeout, underline), and font size.
➣ Choose the text color for the front and back of the card. You can also select the "do not print this object" and "lock object" options.
➣ In other settings tabs, you can rotate your text angle, border style, and color.
➣ Add background using background tool and edit the card as per requirement.
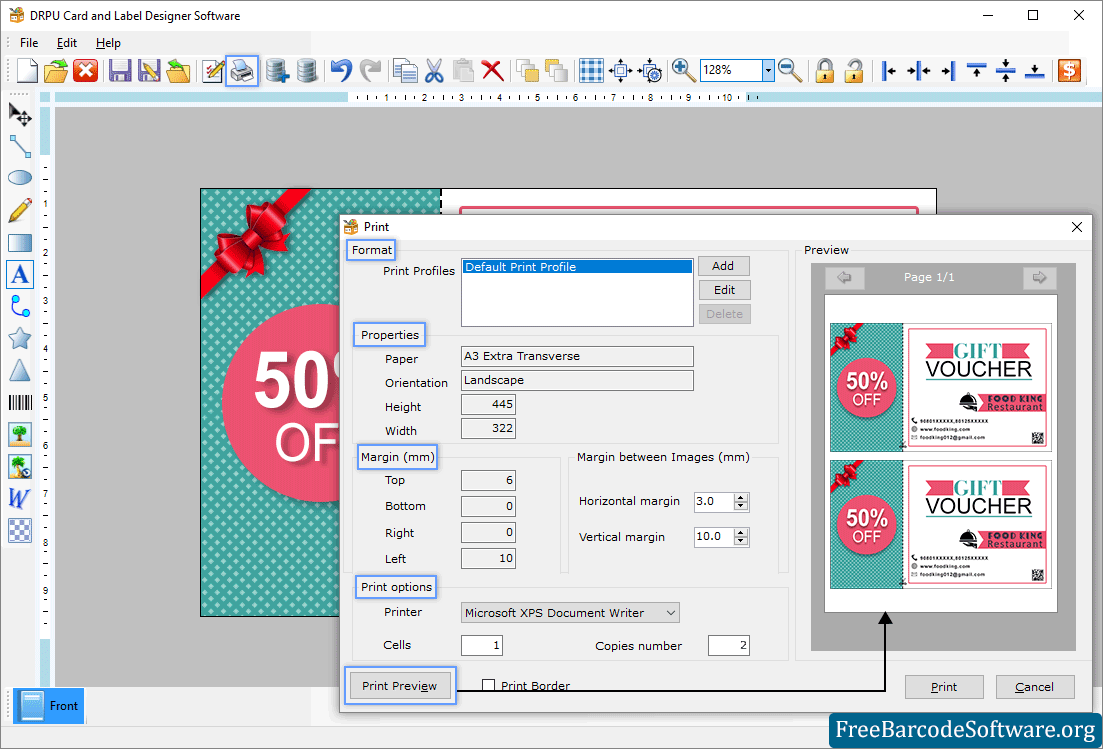
Step3: Before printing your cards, set the print format option according to your needs.

Fill in the necessary print setting attributes to print the designed card.
➣ In the properties tab, choose paper type and orientation, and set the height and width of the paper.
➣ Set the page margin and the margin between images by rows and columns.
➣ Choose other print options like printing format (Microsoft to PDF, OneNote and Fax), number of cells per page, number of page copies etc.
➣ Print preview your designed card, then click the print button to print it.